一、引言
当我们使用 SpringBoot 进行开发时,会引入许多的 starter 包,引入后就会为我们做一些自动化配置,省去了大量配置的时间,快速开发。
以 Redis 为例,当我们引入 Redis 的 starter 包时:
1 | <dependency> |
spring-boot-autoconfigure 包中有一个类叫做 RedisAutoConfiguration ,该类头上有三个注解:
@Configuration:标明该类是一个配置类,并注入容器@ConditionalOnClass:当需求类均存在时,满足启用要求@EnableConfigurationProperties:开启 @ConfigurationProperties 注解
当 spring-boot-starter-data-redis 包被引入后,@ConditionalOnClass 的要求被满足,RedisAutoConfiguration 这个类就会被启用。在图中可以看到最后注入了一个名为 redisTemplate 的 Bean,这个 Bean 我们很熟悉,用它就可以来操纵 Redis。
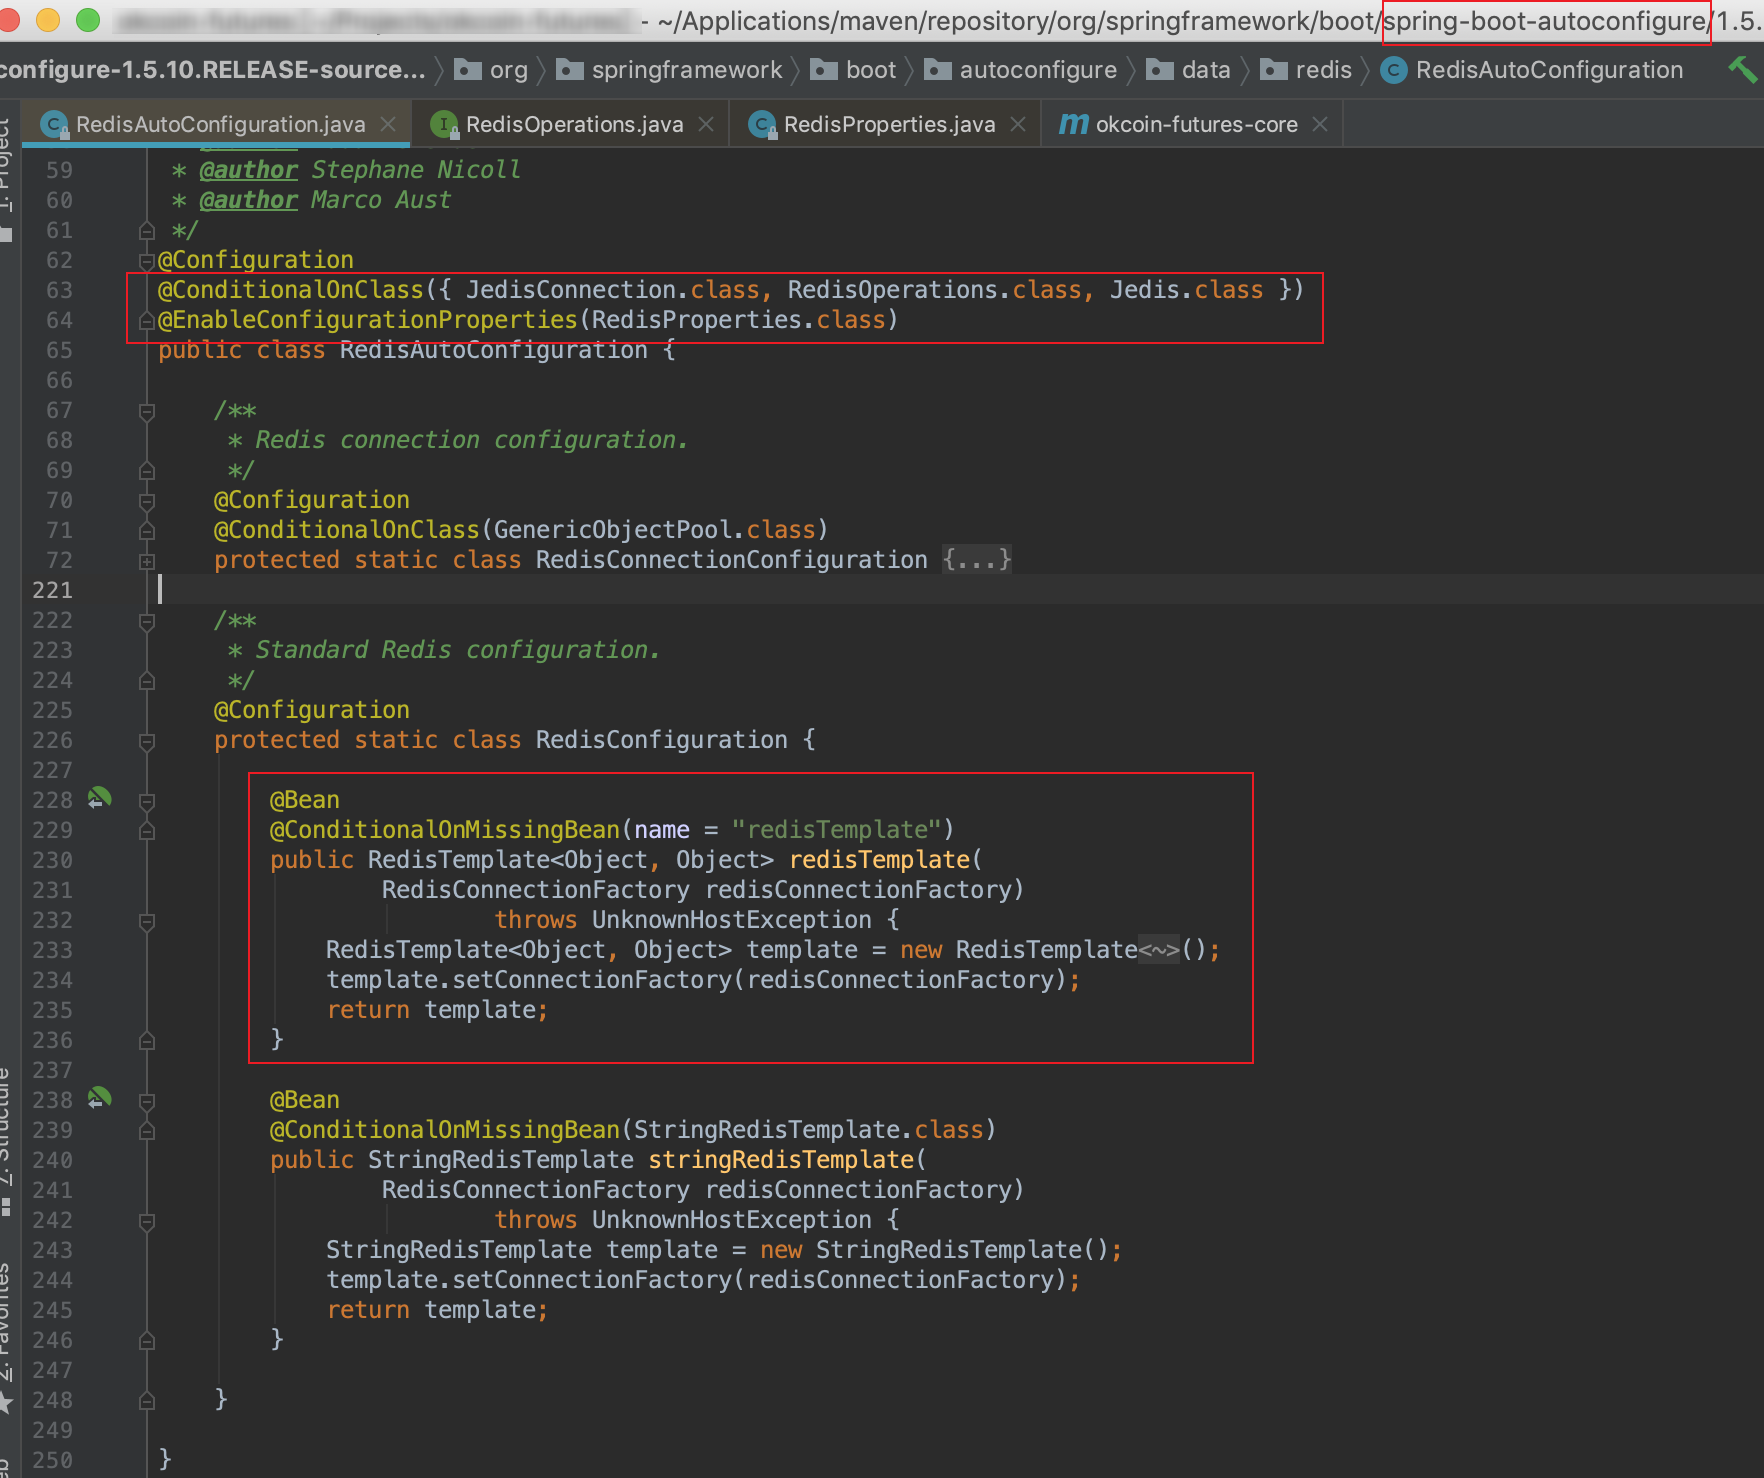
@ConditionalOnClass注解是上面流程中最关键的注解,你可以认为它是一个开关,只有满足这个注解的条件,这个开关才会打开,这个类就会启用。这就是 SpringBoot 自动配置的关键,只有引入相关的 starter,@ConditionalOnClass 的条件才会满足,自动配置才会生效。
二、简单实践
@ConditionalOnClass是 SpringBoot 二次封装的注解,它的底层依赖于 Spring 的 @Conditional 注解。
1 |
|
@Conditional 注解又名 条件注解,下面就来跟着我一探究竟吧!
2.1 引入依赖
让我们脱离 SpringBoot 框架,建立一个 Maven 项目,只引入 Spring 的依赖:
1 | <dependencies> |
2.2 接口与实现类
定义一个名为 Animal 的接口,这个接口只有一个方法,即 say():
1 | public interface Animal { |
然后分别定义 Dog 和 Cat 的实现,众所周知,狗和猫的叫声是不一样的~
1 | public class Dog implements Animal { |
1 | public class Cat implements Animal { |
2.3 条件类
有了 Dog 和 Cat 这两个实现类,下面需要配合 @Conditional 注解来决定什么时候加载。首先我们需要定义加载的规则,简单起见,以读取环境变量的 animal 属性为例。
@Conditional 属性的条件规则需要实现 Conditional 接口,该接口的 matches() 方法决定了是否加载。分别定义两个 Condition,用于判断是否加载 Dog 或者 Cat。
1 | public class DogCondition implements Condition { |
1 | public class CatCondition implements Condition { |
2.4 配置类
下面就是关键的配置类的信息了:
1 |
|
你可以看到这里注入了两个都叫 animal 的 Bean,我们知道默认情况下同名会被覆盖,因此我们通过 @Conditional 注解决定了到底应该如何加载。
-
当
@Conditional(DogCondition.class)满足时,加载 Dog; -
当
@Conditional(CatCondition.class)满足时,加载 Cat。
2.5 启动类
让我们写入一个启动类来实现下,首先设置了环境变量中 animal 的值,然后将配置类注入容器并刷新 context,最后从容器中取出 Bean,并调用 Bean 的 say() 方法。
1 | public class Application { |
当变量值为 cat 时,输出:
1 | 喵喵~ |
当变量值为 dog 时,输出:
1 | 汪汪~ |
三、@Profile
在实际开发中,由于存在开发、测试、预发、生产等多套环境,程序中相应的也会准备多套配置文件,根据当前环境选择对应的配置文件。传统情况下我们会建立多个 application.yaml,命名符合 application-{profie}.yaml规范,然后通过 spring.profiles.active={profile} 来指定环境。
我们可以利用 @Profile 注解来决定在什么环境下加载配置。例如在 dev 环境下加载 Dog,在 test 环境下加载 Cat。
3.1 配置类
修改配置类如下,不再需要 Condition 注解,使用 @Profile 注解决定是否加载:
1 |
|
3.2 启动类
修改启动类如下:
1 | public class Application { |
通过 setActiveProfiles() 手动指定当前环境,当值为 dev 或 test 时,得到的运行结果符合预期。
四、更多注解
回到 SpringBoot,除了一开始介绍的 @ConditionalOnClass 外,SpringBoot 还封装了这些注解,供我们使用:
| 注解 | 注释 |
|---|---|
| @ConditionalOnSingleCandidate | 类似于@ConditionalOnBean 但只有在确定了给定bean类的单个候选项时才会加载bean。 |
| @ConditionalOnMissingBean | 当给定的 Bean 不存在时返回 true 各类型间是 or 的关系 |
| @ConditionalOnBean | 与上面相反,要求bean存在 |
| @ConditionalOnMissingClass | 当给定的类名在类路径上不存在时返回true 各类型间是 and 的关系 |
| @ConditionalOnClass | 与上面相反,要求类存在 |
| @ConditionalOnExpression | Spel 表达式成立,返回 true |
| @ConditionalOnJava | 运行时的Java版本号包含给定的版本号,返回 true |
| @ConditionalOnProperty | 属性匹配条件满足,返回 true |
| @ConditionalOnWebApplication | web环境存在时,返回 true |
| @ConditionalOnNotWebApplication | web环境不存在时,返回 true |
| @ConditionalOnResource | 指定的资源存在时,返回 true |
 wechat
- alipay